Hello

Girl loves beauty and preening. We are no exception. We love to make home cozy with charming decorations. We also love little tiny hand-made things that make girls look more feminine. These foster the idea to open Oriental shop where we can share our inspiration and passion for feminine splendors. We hope that we are not just sellers and customers but friends who can share our love for beauty. More about Oriental

That was a day my friend

October 14, 2012

It has been a long time I've not updated my blog right.
I wanna write a lot of things, to tell you about how hardworking we tried to make our shop better.
We came out...We had two first stores at a flea market and Sunday market at the same time.
And especial, we had our first sales, day by day, from 18 Oct until now.
Today is the Vietnamese women day so I wish all of my two beloved partners and all of you a good day to shopping, to  relax, to do whatever you like.


This is some picture to show off our store. :)

Q.A


Oriental colour Corner

September 26, 2012

This is our earrings hanger.


The hanger is made and also designed  by us :).

Enjoy it!

Love is love

September 24, 2012

 
One of our clients :D
Today, we attended LGBT flash-mob. 

Have you ever heard about LGBT flash-mob? This is an event organized and sponsored by Vietnam's Institute for Social, Economic and Environment (iSee) to support  the lesbian, gay, bisexual, and transgender community  in Vietnam. LGBT flash mob's slogan is "Love is Love" - love with no discrimination. Everyone deserves to be loved and is equal in love no matter what their gender and race are, and whether they are invalids or normal persons. It's so warm and amiable as every one shares the same feelings and a single message that "let's share and spread sincere love, you will see how wonderful life is, how "love is love" is".

There were about 100 people attending the flash-mob and many others as supporters. With 2 weeks of preparation and practice, we had a successful event. We had a lot of fun and met many new friends as well. The event made our life more meaningful as we can do something for our community, spread our love and strive for others' love. It also "moves" our routine life and gives it more "spice".
Our team


Starting point - Point de départ- my Oriental

September 11, 2012


This is the period for promoting our shops. It takes time,I swear.... :)
I must join all the social media, such as facebook, twiter, linkedin, pinterest.
Nearly one months passed by with 1500 view but no sales. :))
"No" that means "not yet" but not "never"  :))
I think right?

So, for next time Things to do is:
  • ·  gain more traffic
  • ·  lead to more sales
  • ·  build my brand
  • ·  build relationships and interact with mycustomers outside of Etsy
  • ·  increase my Google rank
  • ·  create more time to be creative!
  • ·  create more time for my customers

Our spirit is hot like Autumn fire so allez!!!!!! 

Good things come to those who wait

September 04, 2012


I saw a phrase from an article on internet :"Vietnam at a glance: Good things come to those who wait" - HSBC.
Hope that it will be the same with all of us. :)

DIY - How to make painted lace earrings

August 30, 2012

We came up with the idea of creating lace earrings as this product is such a simple product to be made but you can bring your own charm with your own style, totally up to your creativeness. We are happy to share our simple techniques. Hope this help. This topic is open to discussion as well. Your contributions are certainly valuable additions to enrich the products, and by the end of the day, what we need is OUR TRULY CHARM
All we need are:
- a scissor
- a pincer
- an awl
- a clip and a paint brush
To create styles for the earings we also need:
- glue or nail colour
- water colour
- a plastic sheet or any sheet of the same kind for colour mixing (you’d better make use of anything that is available in your house)
- small wires
- pinches and beads

Step 1: Snip apart the individual flowers/pattern of the lace. Be sure just to cut the connecting threads and not cut into the flower/pattern itself. In this step, make use of your imagination and creativeness to choose and cut the pattern. The chosen pattern/flower will be something unique – something that is created by you, and there won’t be any second earring of the same pattern!
Step 2: Paint the glue/nail colour to make the lace stiffened
Step 3: Mix the colours that you want and paint on both sides of the lace. We use the colour paint that is waterproof (we already made a test by leaving the painted lace in water for a few minutes)
Step 4: Wait until the first colour is dry, then paint the second colour to create a fading effect. You can use darker or lighter colour, or another colour, totally up to your creativeness.
Step 5: After both sides of the lace are dry, snip apart the individual flowers/pattern of the lace. Be sure just to cut the connecting threads and not cut into the flower/pattern itself.


Step 6: Prick holes and use the pincer to put in the wire and beads.

And tada!!! This is your own style earring!

Tips: With non-color earings, you only need step #1, 2 and 5 & 6. Note that you need to choose the right side of the lace (the up side). Look at the lace and figure out what piece of the pattern you’d like and trim around it. Decide how you want the lace to look like when they become earrings. More of our products for your reference are available at Our Etsy shop .

If you have any questions, please do not hesitate to share with us.

Good luck with your DIY and please show your works as well. It’s something you’ll be proud of.

How I photograph Oriental's crafts - my first-time-ever trial

August 21, 2012


This is my experience of taking a craft photo. One month ago, we decided to open Oriental on Etsy, my main mission is photograph and Pr for our shop. I’ve searched and read many tips on Etsy seller handbook  about photographing.

But when we finished our product and I took picture, I still had difficulties. It likes you have studied not enough.So I searched again and again on internet, on utube, to improve my skill. The more I practice, the better my works are. I want to share with you my tips, my experiments, and also some fails I got. By the end of the day, I had a lot of funs with this photographing!

I used my Nikon D80 with lens kit AF-S Nikkor 18-70mm f.3.5-4.5 G ED to take photo.

1.    First time: I tried to take a photo with a reflector like the photo, I simply thought that, a good camera is enough. But, this is one of my first studo. With the light is too hard and no diffusion. I’m not please at all with the result.
1st studio
2.    Second time: This is the first time I got acquainted with still - life photography. It's really interesting to know how they set up the light to have the diffusion. I followed the tutorials which I found on Utube and also on some blog. I made use of all equipment I have at home, to make my own "studio": A piece of remaining tracing paper since I was in university  to diffuse the light, the aluminum paper in the kitchen like a reflector, my drawing table to stick the aluminum paper etc. How happy I am when I saw the lighting effect when I use this way. The result is quite good with a lot of help of photo editor software. But I’m not totally satisfied because of the complicated setting I’ve made. It takes time. So I tried to search on internet with key words "how to photograph craft or jewelry or products" and i found the "light box" which will make my work easier.
2nd studio

3.    Third time: Voila, this is my 2$ dollar lightbox, maybe you don’t believe but it’s true, because I took a wooden frame on the street, somebody spited, then I enclosed it by bag plastic, which easy to find at your home with clue of 1$ and sticking plaster which cost 1$. So, 2$ for a lightbox.
And here are the photo I’ve made with my "hand-made" studio and one with a lightbox.
With a little help of computer software, so It’s done!!!
$2 lightbox
I will not write about the photographing techniques, about setting up the light, I won’t repeat because you can easily find on internet, I just want to share you my lessons after my trip to craft photograph success.
The sence
1st time without lightbox &white background
And my lesson is:

  • There are many tips on internet you can learn from them like:  Etsy seller handbook or Product photography 
  • You can watch illustration on You tube or Google by searching some keywords like: still-life photography,  product photography or still-life light setting, etc.
  • Then list all the equipment you need and think about how to get it.
  • Then, you can learn from others' photos which has been taken that you found beautiful or worth learning from.
  • 2nd time without lightbox
  • The point is that: you shouldn't just watch/read, you need to give a hand on it, practice photographing! Don't just keep researching. My advice is to practice and learn from what you've done so far. While practicing, you understand the mechanism of craft photographing and find it more interesting, especially when the result is reflected in your photos which are obviously better.
And that's my own experience. I will continue to search for tips on the internet as I might not learn all what forerunners want to deliver.
3nd time with $2 lightbox

A new beginning- Oriental Colour- Handmade shop

July 19, 2012

In Summer 2012, we start to realise our dream to have a shop of our own - our Oriental. This is the first time we open an online shop and we understand that the very first thing to do is to have the most pretty products for Oriental
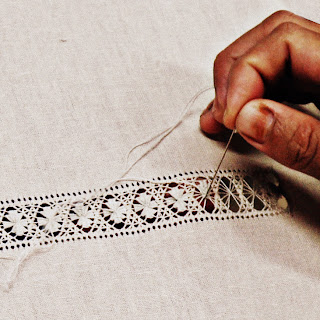
We are three both love handmade, DIY things and we will make products from categories: lace, embroidery, hemstitching...like napkin, table cloth, table mat, earrings etc.
It's not easy but someone has said:
Whatever you do, or dream you can, begin it. Boldness has genius and power and magic in it.

 
Oriental Colour © 2012 | Designed by Bubble Shooter, in collaboration with Reseller Hosting , Forum Jual Beli and Business Solutions